8b - Configure Leaf with IIS

The following IIS guide assumes you are using a combined web & app single server to both host the Leaf API and handle user traffic.
On the web/app server:
- Install the .NET Core Hosting Bundle
- Install IIS URL Rewrite
-
Install Shibboleth Service Provider 3
Be sure to check
Configure IIS7 Modulebox during installation. -
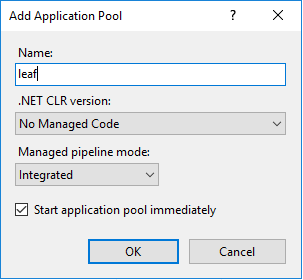
Create an Application pool to run the site and API.
-
Create a service account for IIS to run the application as.
Info
In this walkthrough we use
sv_uw_leaf_servicebut use whatever naming convention is appropriate for your environment -
Add Write permissions for the service account to your logging directory (where the SERILOG_DIR environment variable is pointing to; this example uses
F:\leaf)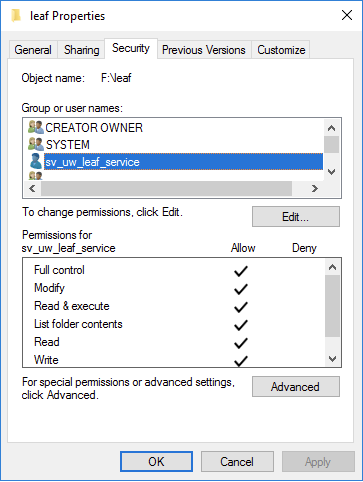
Warning
This step is critical, as if IIS is unable to write log activity, you'll also be unable to understand errors or other issues the API encounters!
-
In the new Application Pool's
Advanced Settings, setIdentityto the service account created in (6)Load User ProfiletoTrue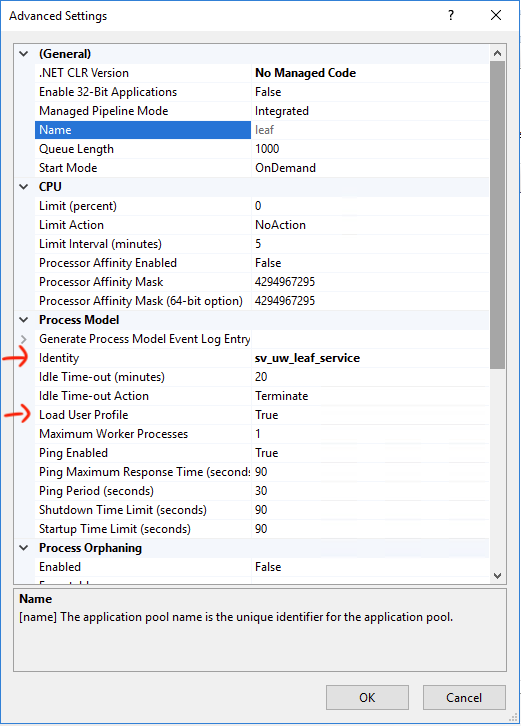
-
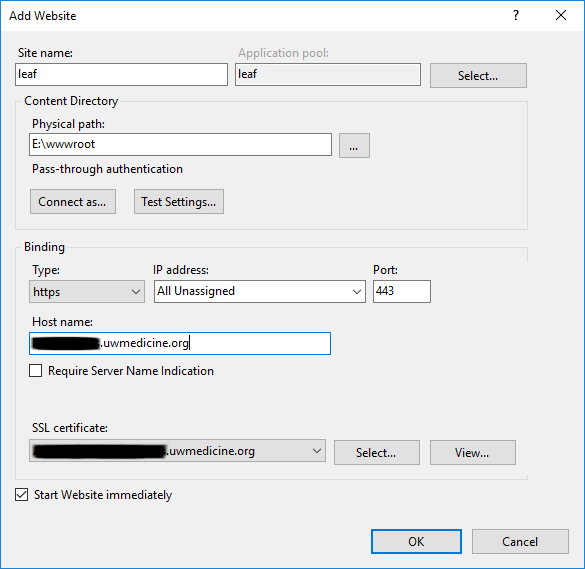
Create the website to host the Leaf browser application.
-
Create an application behind the site to host the API.
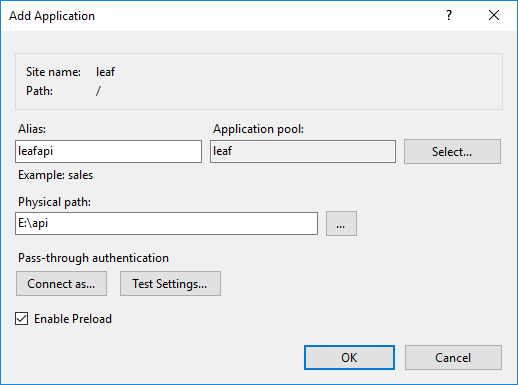
Do NOT name the API application
'api', as this will cause the rewrite rule to apply recursively until the request fails. At UW we name the backing application'leafapi' -
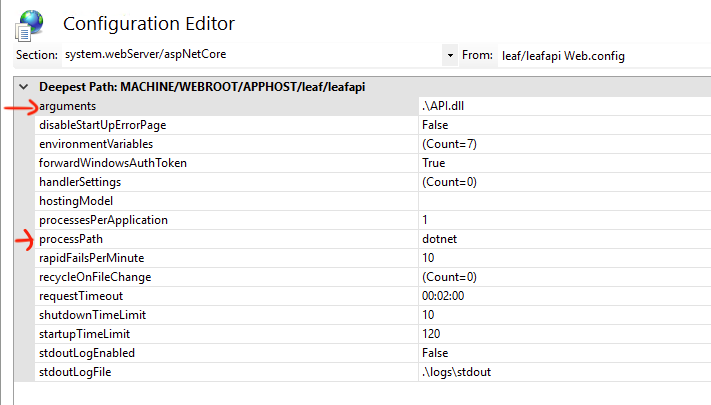
In the
Configuration Editor, underSection:system.webServer/aspNetCoresetarguments->.\API.dllprocessPath->dotnet
-
Create a URL rewrite rule on the site with the following template.
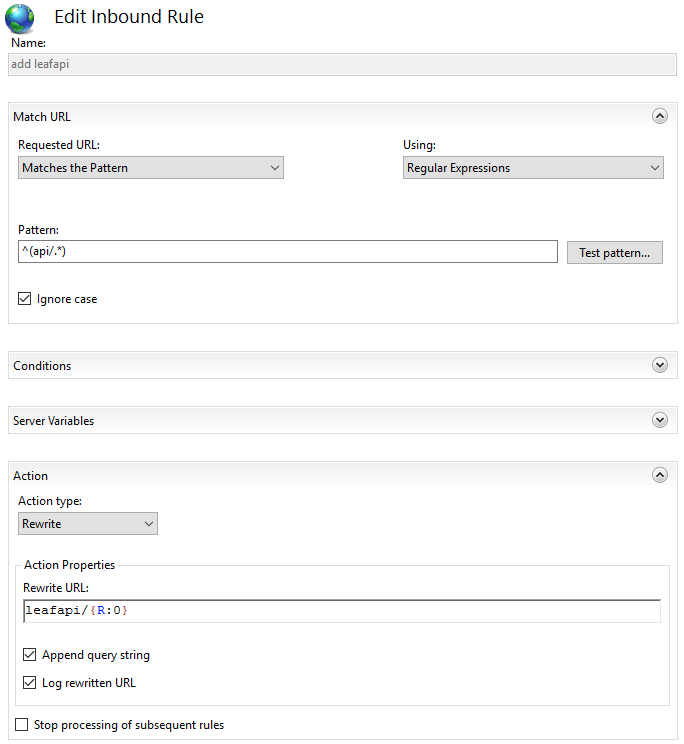
Be sure the
Append query stringbox is checked. If not, API calls for Concept search will failYour
web.configshould now look like this:<system.webServer> ... <rewrite> <rules> <rule name="add {applicationName}"> <match url="^(api/.*)" /> <action type="Rewrite" url="{applicationName}/{R:0}" appendQueryString="true" logRewrittenUrl="true" /> </rule> </rules> </rewrite> </system.webServer> -
If the WebDAV module is installed in your IIS instance, you need to either uninstall it or disable it for this site. It inteferes with PUT/DELETE HTTP verbs.
<system.webServer> ... <modules runAllManagedModulesForAllRequests="true"> <remove name="WebDAVModule" /> </modules> </system.webServer> -
If you have not yet created the environment variables for IIS (as described in Step 7 - Set Environment Variables), do so now.
Warning
Before moving on, we strongly recommend checking that the Leaf API starts appropriately and can log correctly. If you skip ahead and check the Leaf client and get an error, the error may simply be symptomatic of the API not running. To check the API, start the Application Pool, then:
Confirm that you can see an output log file in your SERILOG_DIR directory - If so, the first line should read something like {"Timestamp":"...", "Level":"Information","MessageTemplate":"Starting Leaf's API v{Version}..."
If no log files appear:
- Make absolutely sure your service account is running in IIS and has permissions to write to the
SERILOG_DIRdirectory. - Check the Windows Event Viewer application for possible errors:
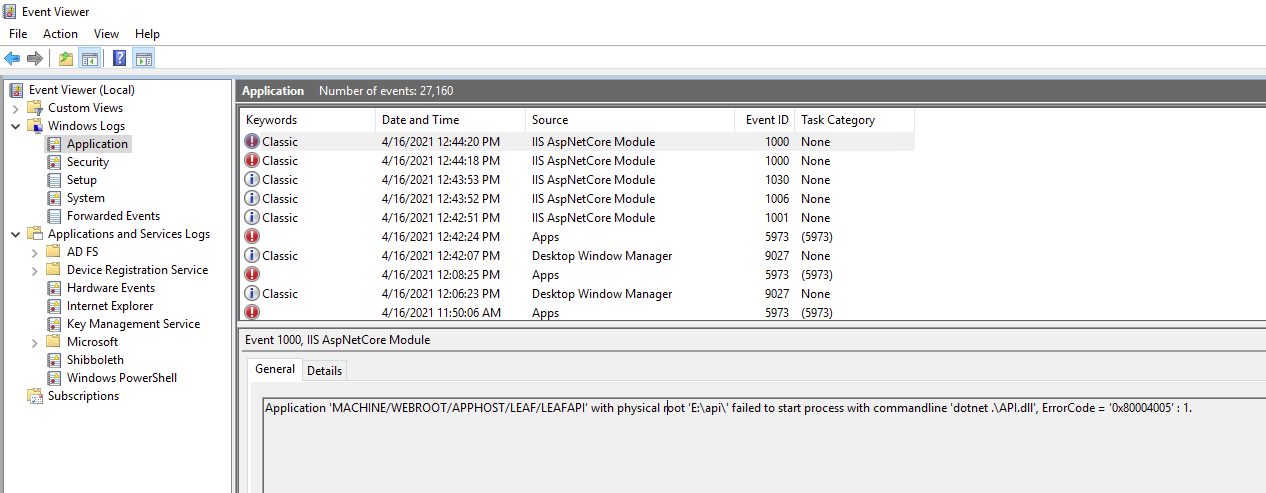
If log files appear but show an error such as SqlException...
- Check that the values in your LEAF_APP_DB environment variable connection string are correct, such as username and password.
- Check that your service account has appropriate privileges to your app database.